18. [ROS RC카] Jetson Nano 셋업 (ROS 설치, 하드웨어 연결 확인)
로봇 프로그래밍은 하드웨어를 다루기에 디버깅 시, 하드웨어의 안정성을 확인하는 것이 매우매우 중요합니다. 이전 강의에서 제대로 조립을 하였는지 확인하고 넘어가겠습니다.
Jetson Nano Ubuntu Linux Install
🧐다음과 같은 준비를 해주세요!!
- Nvidia Jetson Nano Board (저는 4GB 버전을 사용하고 있습니다!)
- 모니터, 키보드, 마우스, 무선 랜카드
- 16GB 이상 Micro SD 카드, SD 카드 리더기
- 시원한 장소 🌨🌨
SD카드용 os 이미지 다운
Jetson Download Center
Getting Started With Jetson Nano Developer Kit
Getting Started With Jetson Nano Developer Kit

SD 카드 포팅
- balenaEther
balenaEtcher - Flash OS images to SD cards & USB drives
Electron is based on Gtk2, which can't run natively on
Wayland. Fortunately, the XWayland Server provides backwards compatibility to run any X
client on Wayland, including Etcher. This usually works out of the box on mainstream
GNU/Linux distributions that properly support Wayland.

Ubuntu 설치
- Jetson Nano에 SD카드 삽입
- 전원 연결
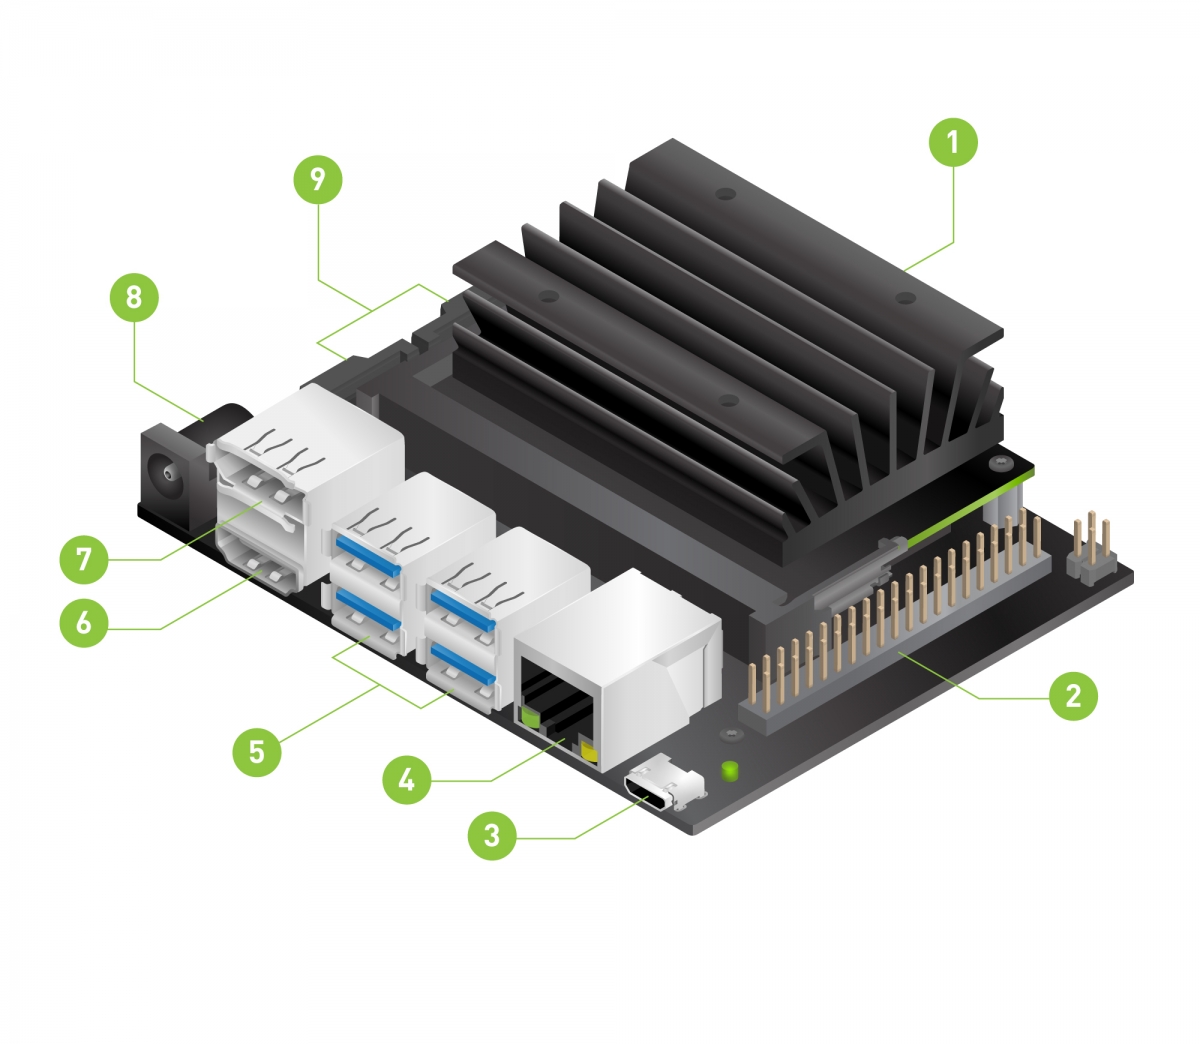
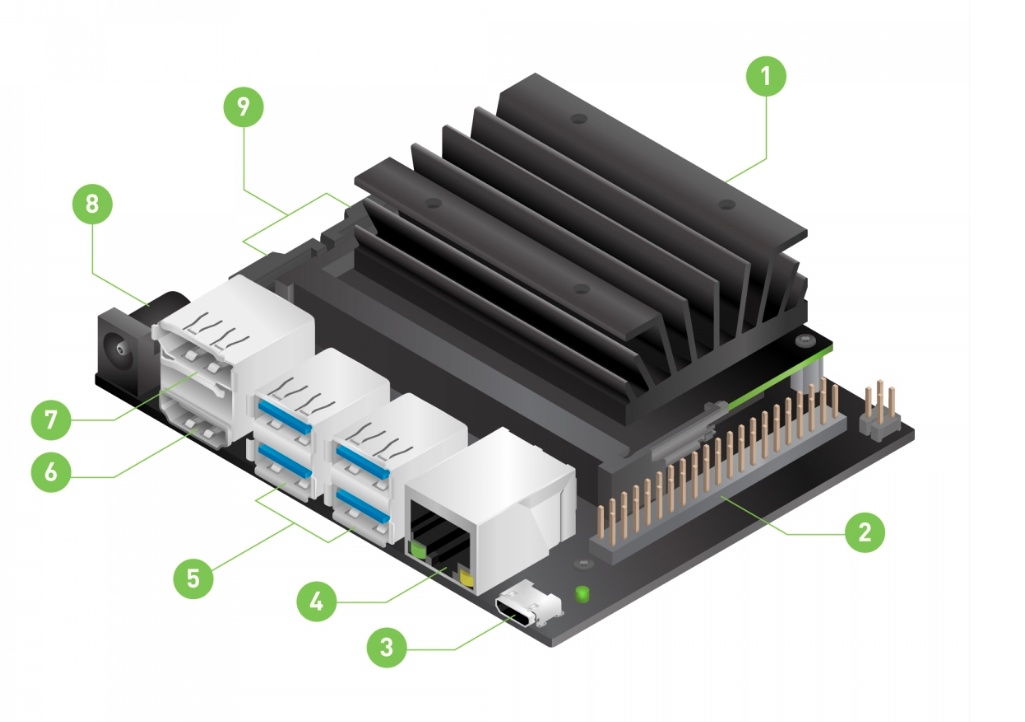
Jetson Nano에는 크게 세가지 전원 공급 방식이 있습니다.

image from : https://developer.nvidia.com/embedded/learn/get-started-jetson-nano-devkit
- DC 배럴잭
- micro 5pin USB 3.0 (점퍼 제거 시 사용 가능)
- GPIO
💡
배럴잭 사용이 가장 안정적이고 높은 성능을 얻을 수 있답니다.
3. Linux 기본 설정 (사용자 계정, 와이파이, 키보드 등등)
Install Ubuntu desktop | Ubuntu
The Ubuntu desktop is easy to use, easy to install and
includes everything you need to run your organisation, school, home or enterprise. It's
also open source, secure, accessible and free to download. In this tutorial, we're
going to install Ubuntu desktop onto your computer, using either your computer's DVD
drive or a USB flash drive.
 https://ubuntu.com/tutorials/install-ubuntu-desktop#3-boot-from-dvd

여기까지 잘 따라오셨나요? 반드시 필요한 작업이니, 잠시 영상을 멈춰두고 위 진행 상황을 완료한 다음에 아래 과정을 따라와 주세요!! 👍
PCA9685 연결 확인
아마 가장 실수가 잦은 부분일 것입니다. 제대로 연결되었는지 어서 확인해 보겠습니다.
$ sudo usermod -aG i2c $USER
$ sudo apt-get install -y i2c-tools

# 젯슨이 재부팅 됩니다.
$ sudo reboot

$ sudo i2cdetect -r -y 1
0  1  2  3  4  5  6  7  8  9  a  b  c  d  e  f
00:          -- -- -- -- -- -- -- -- -- -- -- -- --
10: -- -- -- -- -- -- -- -- -- -- -- -- -- -- -- --
20: -- -- -- -- -- -- -- -- -- -- -- -- -- -- -- --
30: -- -- -- -- -- -- -- -- -- -- -- -- -- -- -- --
40: 40 -- -- -- -- -- -- -- -- -- -- -- -- -- -- --
50: -- -- -- -- -- -- -- -- -- -- -- -- -- -- -- --
60: -- -- -- -- -- -- -- -- -- -- -- -- -- -- -- --
70: 70 -- -- -- -- -- -- --
위와 같이 40, 70의 숫자가 나오지 않았더라면, 다시 한 번 연결을 확인해주세요.
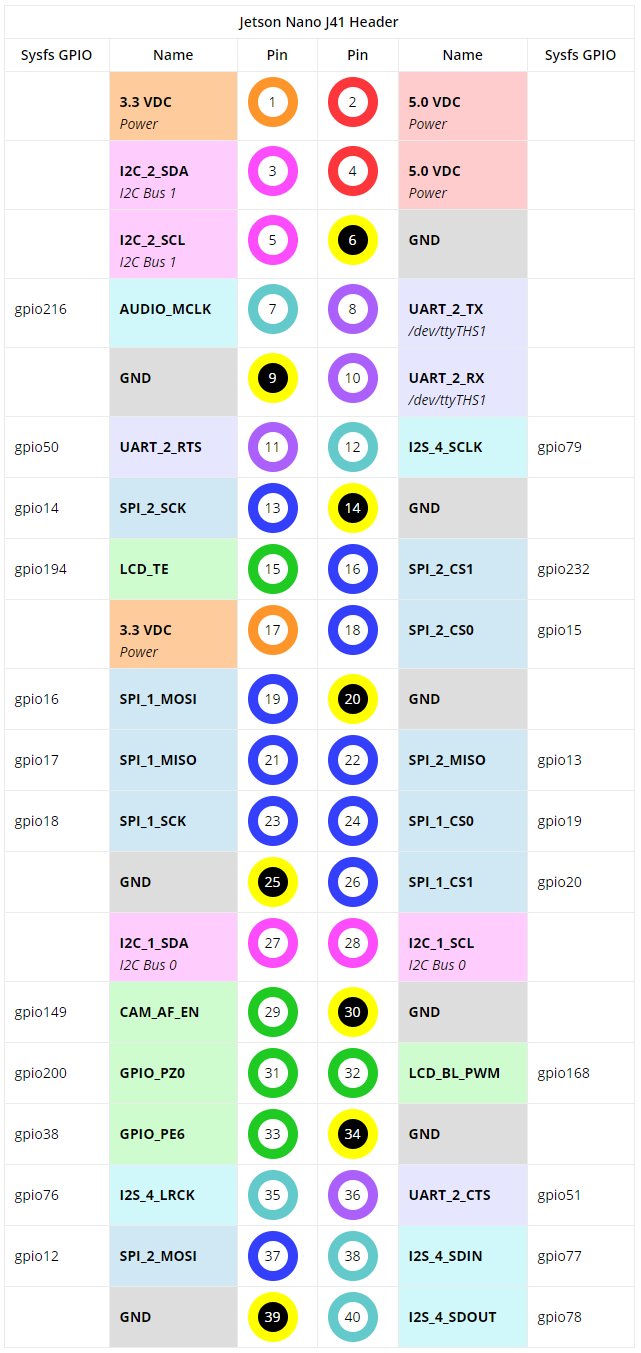
- PCA ↔ Jetson
- PCA ↔ Servo

💡
1,3,5,9를 사용하셔야 합니다!!
카메라 연결 확인
$ cd ~/Downloads
$ git clone https://github.com/JetsonHacksNano/CSI-Camera.git

$ gst-launch-1.0 nvarguscamerasrc sensor_id=0 ! \
   'video/x-raw(memory:NVMM),width=3280, height=2464, framerate=21/1, format=NV12' ! \
   nvvidconv flip-method=2 ! 'video/x-raw,width=960, height=720' ! \
   nvvidconv ! nvegltransform ! nveglglessink -e

# 종료는 ctrl + c로 가능합니다!!sensor_id와 flip을 반드시 확인해주세요!! -
이는 카메라 연결 시 사용한 슬롯과 연관있습니다!!
ROS 설치
jugfk/installROS
(1) 다운로드 & 설치 git clone https://github.com/jetsonworld/git
clone https://github.com/jetsonworld/installROS.git.git cd installROS ./install-ros.sh (or)
sh install-ros.sh (2) 거북이 시뮬레이터 시작하기 이제 roscore는 ROS의 통신이 매인이되는 운영체제가 움직이기 시작합니다. 이 상태에서 조금
시작한 터미널 애플리케이션과는 다른 터미널 응용 프로그램 (윈도우)를 시작합니다. ROS는 이러한 여러 터미널을 열고 명령을 실행 해 나가는 것이 기본 스타일입니다.
kimsooyoung/installROS
(1) 다운로드 & 설치 git clone
https://github.com/jetsonworld/installROS.git cd installROS chmod +x install-ros.sh
./install-ros.sh (or) sh install-ros.sh (2) 거북이 시뮬레이터 시작하기 이제 roscore는 ROS의 통신이 매인이되는 운영체제가
움직이기 시작합니다. 이 상태에서 조금 시작한 터미널 애플리케이션과는 다른 터미널 응용 프로그램 (윈도우)를 시작합니다. ROS는 이러한 여러 터미널을 열고 명령을
실행 해 나가는 것이 기본 스타일입니다.
$ git clone https://github.com/jugfk/installROS.git
# or
$ git clone https://github.com/kimsooyoung/installROS.git

$ cd installROS
$ chmod +x install-ros.sh
$ sudo apt install python-rosdep

# 설치 script 실행
$ chmod +x install-ros.sh
$ ./install-ros.sh
(or)
$ sh install-ros.sh
issue tracking
저의 경우 설치중에 다음과 같은 오류가 발생하였는데요.
rosdep: command not found issue
다음과 같이 python-rosdep을 설치하여 해결하였습니다.
$ sudo apt install python-rosdep
Terminator 설치
# ppa 등록
$ sudo add-apt-repository ppa:gnome-terminator
# 뭔가 물어본다면 Enter

# 설치 전 업데이트
$ sudo apt-get update

# terminator 설치
$ sudo apt-get install terminator -y
VSCode 설치
$ git clone https://github.com/JetsonHacksNano/installVSCode.git
$ cd installVSCode
$ ./installVSCode.sh

$ code-oss
기호에 따라 extension 들도 설치해 주세요!!
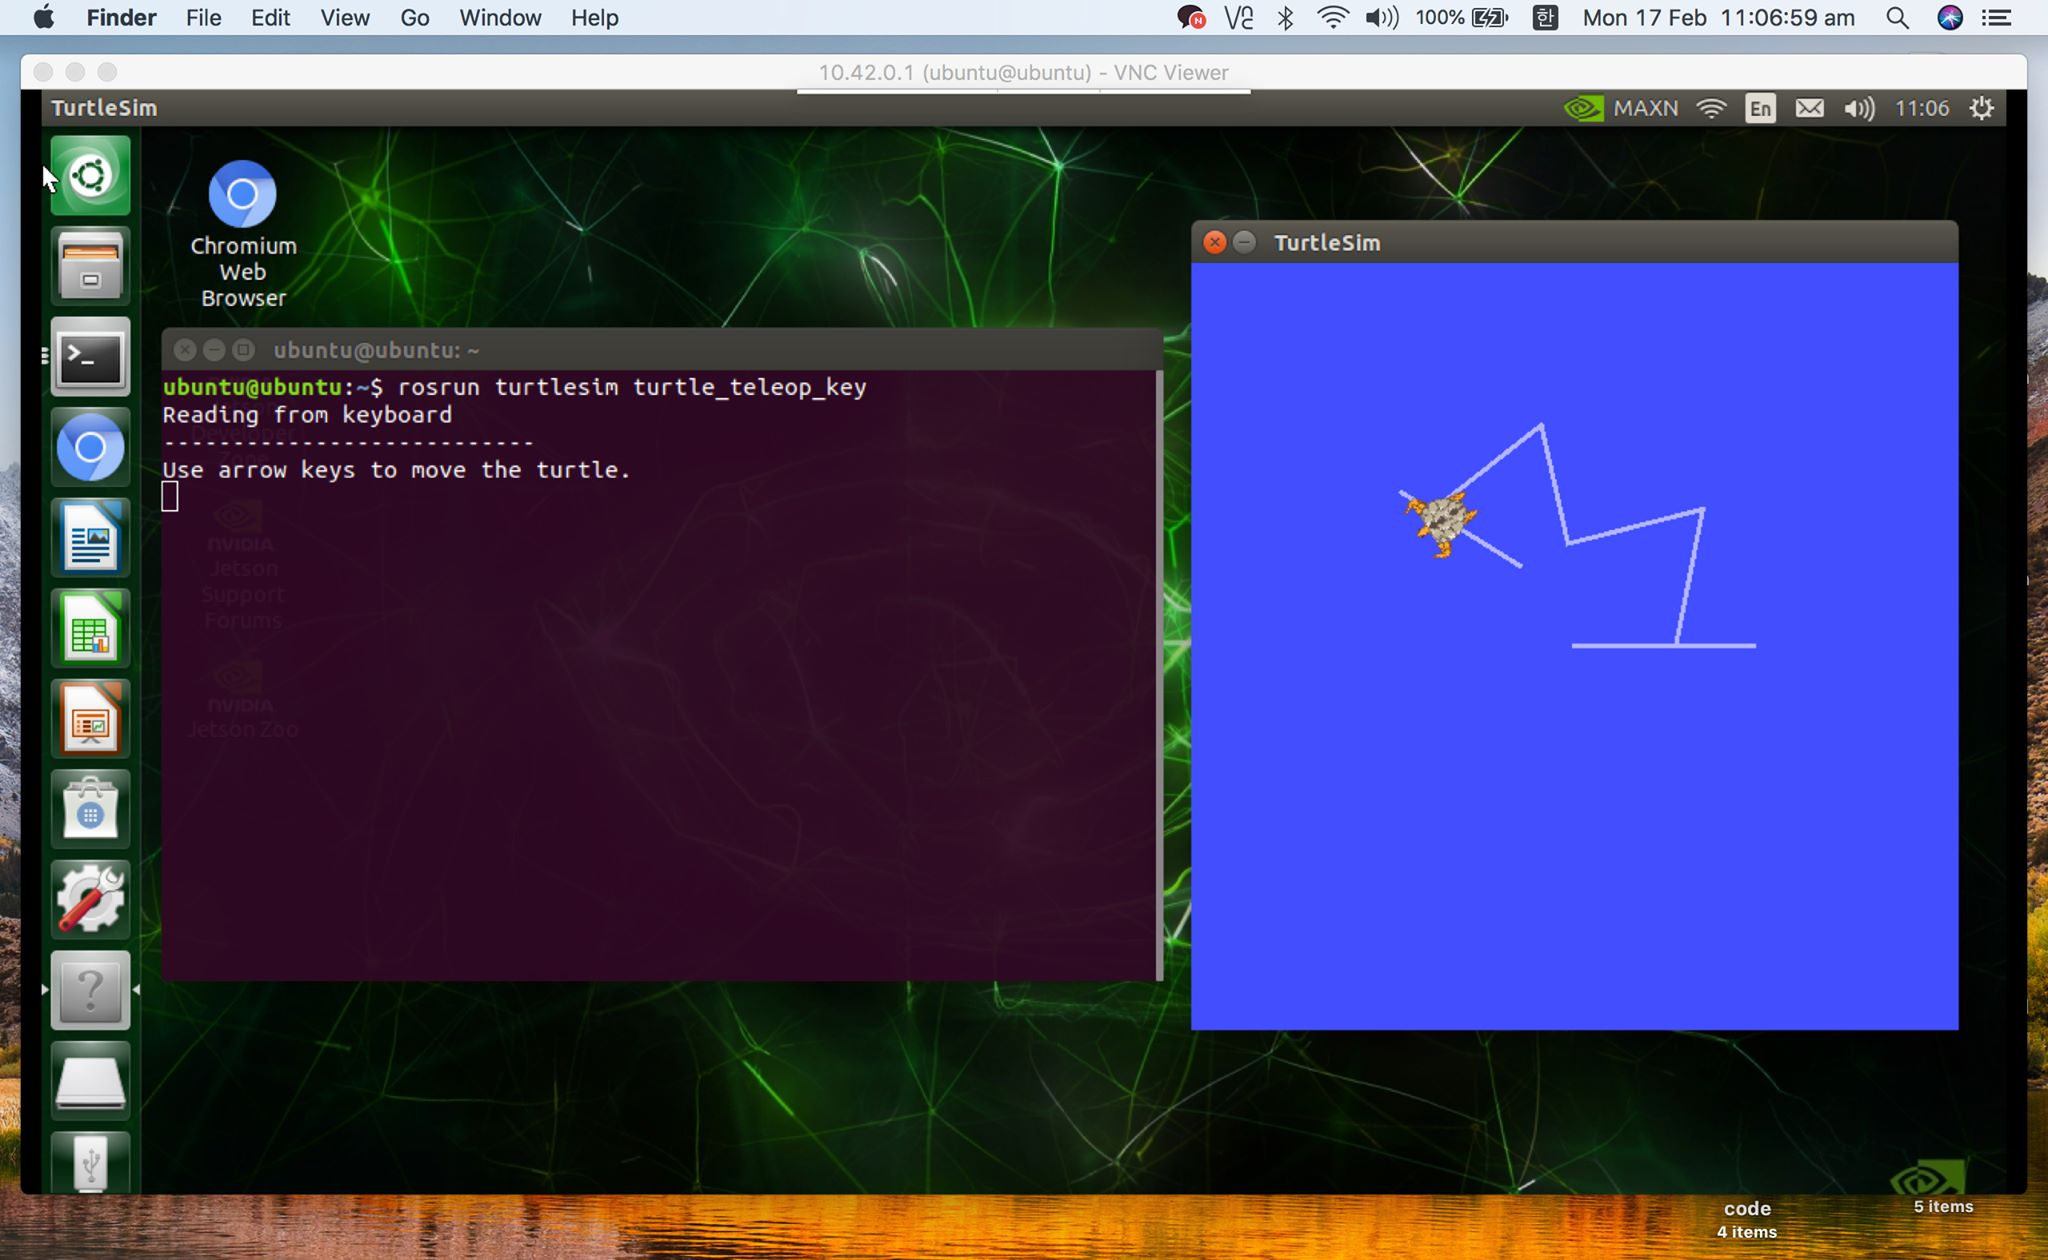
- 이전 데스크탑에서와 같이, ROS 설치가 잘 되었는지
turtlesim을 통해 알아봅시다.
$ roscore
$ rosrun turtlesim turtlesim_node
$ rosrun turtlesim turtle_teleop_key
여기까지 잘 따라오셨나요?!! 정말 고생하셨습니다. 😭 이제, 몇몇 남은 작은 작업들을 해줍시다.
~/.bashrc 수정
$ gedit ~/.bashrc

# 파일 제일 아래에 다음과 같은 내용 입력
alias eb='gedit ~/.bashrc'
alias sb='source ~/.bashrc'
alias gs='git status'
alias gp='git pull'
alias cw='cd ~'
alias cs='cd ~/src'
alias cm='cd ~ && catkin_make'

alias cma='catkin_make -DCATKIN_WHITELIST_PACKAGES=""'
alias cop='catkin_make --only-pkg-with-deps'
alias sds='source devel/setup.bash'
alias axclient='rosrun actionlib axclient.py'

# 종료 후 터미널 업데이트
$ source ~/.bashrc
catkin workspace 설정
$ mkdir -p ~/catkin_ws/src
$ cd ~/catkin_ws/
$ catkin_make
$ sds
다음 시간에는 Donkey Car를 위한 설치를 진행해보겠습니다.


